Wooden doors are a popular choice for many homeowners due to their eco-friendliness, moisture resistance, heat durability, and excellent soundproofing properties. However, they are prone to scratches and damage. Sometimes, installers may accidentally scratch or damage the wooden door when changing the lock, making it essential to know how to fix these issues. In this article, we’ll share some practical tips for repairing wooden doors—let’s dive in!
Preparation is Key
Before you begin any repairs, it’s crucial to gather all the necessary tools and materials. You’ll need sandpaper, putty (or wood filler), super glue, repair paste (or paint), a putty knife, a wood polish pen, and a hairdryer. Having these items on hand will make the repair process smooth and efficient.
Fixing Scratches
If the door has scratches, the repair process is straightforward. Start by using sandpaper to smooth out the scratch. Once sanded, clean the area thoroughly and apply repair paste that matches the door’s color. After the paste dries, use the wood polish pen to give the scratched area a polished finish.
Steps:
- Sand the scratched area.
- Clean and apply the repair paste.
- After drying, polish with the wood pen.
Repairing More Significant Damage
Repairing a broken or damaged wooden door requires a bit more effort than simply fixing scratches.
Step 1: Filling the Damage
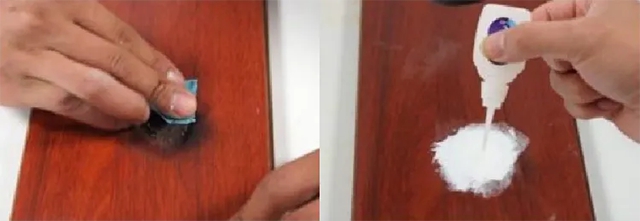
Begin by cleaning out any debris from the damaged area, using sandpaper to remove dirt and smooth the surface. If the damage is deep, mix the putty and fill the hole carefully, or use wood shavings with super glue. After the filler is in place, use the putty knife to smooth the surface. Once smooth, dry the area with a hairdryer.
Steps:
- Clean and sand the damaged area.
- Fill the hole with putty or wood shavings.
- Smooth the surface with a putty knife.
- Use a hairdryer to dry the filler.
Step 2: Sanding and Strengthening
Once the filler has dried, use sandpaper to smooth the surface again. To strengthen the repaired area, add a layer of multi-purpose glue, which will increase the hardness and durability of the repair.
Steps:
- Sand the filled area.
- Apply glue to harden the surface.
Step 3: Coloring and Finishing
Once the glue dries, select a repair paste that closely matches the wooden door’s color. Mix the color until it matches, then apply it evenly to the repaired area. Use a hairdryer to dry the repair paste quickly. After the paste is fully dry, use a darker repair paste to create wood grain patterns that blend with the original door. Finally, apply the wood polish pen to complete the repair.
Steps:
- Match and apply the repair paste.
- Dry the area with a hairdryer.
- Add wood grain patterns using a darker paste.
- Finish with a polish pen.

By following these steps, you can restore your wooden door to its original condition. Now that you’ve learned these repair techniques, are you ready to try them out?
Post time: Sep-18-2024


